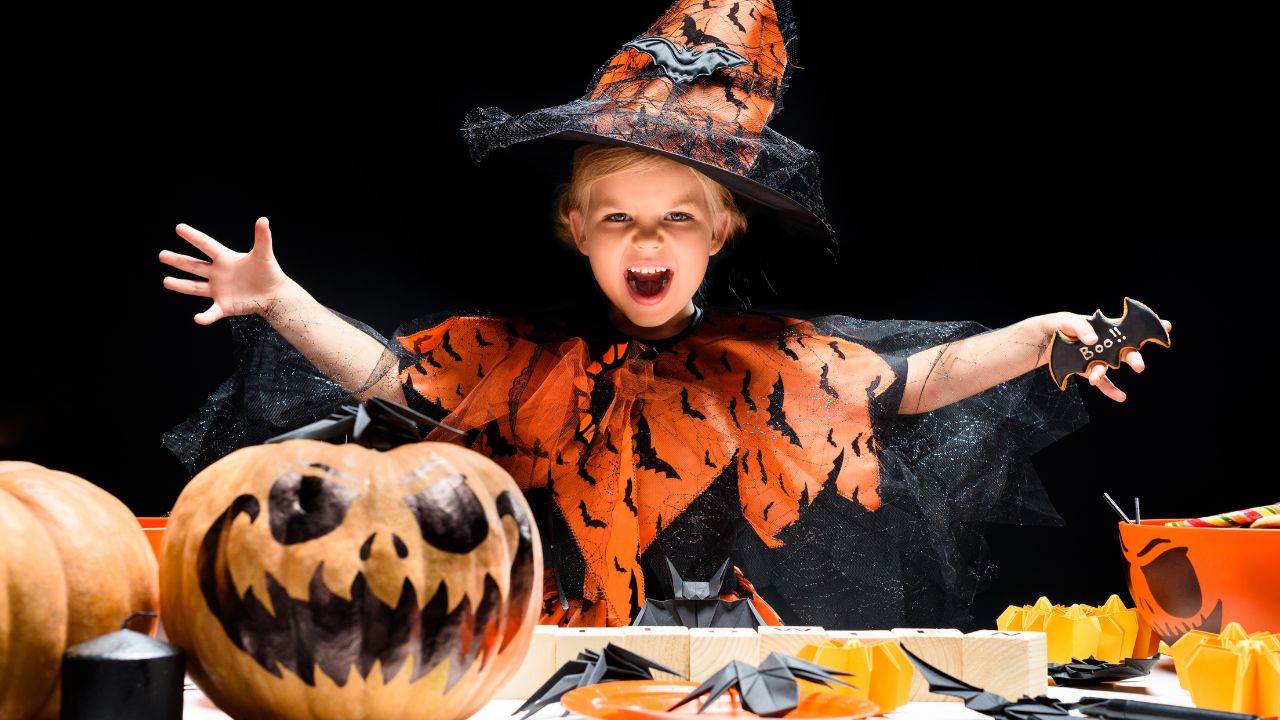
Halloween is that magical mash-up of candy, chills, and creative freedom — the one night when you can be spooky, silly, glamorous, or downright weird. If you’ve ever scrolled through costume sites and thought, “I could do better… if only I knew where to start,” this guide is for you. Whether you’re a total beginner or a crafty pro, you’ll find step-by-step strategies, practical tips, and inspiring examples to build a memorable costume without breaking the bank. Let’s make something spooktacular. 🎃
Why DIY for Halloween?
Making your own costume is more than a money-saver. It’s a way to express personality, flex creativity, and make a piece that fits you — literally. DIY costumes are flexible: adapt them last-minute, reuse parts for future looks, or tweak for comfort. Plus, crafting your costume is often more sustainable than buying mass-produced outfits that fall apart after one night. Think of DIY as costume customization with soul.
Benefits of making your own costume
- Unique style: No one else will have your exact version.
- Budget control: Choose what to splurge on and what to thrift.
- Learning experience: Sewing, prop-making, and makeup skills stick with you.
- Eco-friendly: Upcycle clothing and reduce waste.
Sustainability and creativity
Pulling pieces from thrift stores, using leftovers from previous projects, or swapping with friends cuts waste and yields authentic, textured looks. Creativity often comes from constraints — a limited budget or an odd fabric can produce surprisingly original results.
Plan First: Theme, Budget, and Timeframe
Start with theme, budget, and a timeline. These three simple anchors keep your project fun rather than frantic. A little planning upfront saves frantic midnight sewing sessions and glue disasters.
Choosing a theme that fits you
Pick a theme that suits your vibe. Do you want classic spooky (witch, vampire), pop-culture (TV characters, memes), whimsical (storybook creatures), or DIY-original (mixed-media fantasy)? Consider how much attention you want: subtle detail for close-up photos or big silhouettes for a crowd.
Setting a realistic budget
Assign amounts for fabric, accessories, tools, and emergency fixes. A small budget ($20–$50) encourages thrifty, inventive solutions; a moderate budget ($50–$150) buys nicer materials and electronics like LED strips.
Time management — do this early
Start 2–4 weeks before Halloween for an average costume. Simpler looks can be done in a weekend; complex builds (armor, electronics) need extra buffer. Add a couple of “finish” days for makeup tests and last-minute repairs.
Gather Inspiration and Make a Mood Board
Inspiration is your creative fuel. Collect images, color swatches, textures, and reference poses. A mood board makes design decisions faster and keeps the look cohesive.
Where to look for ideas
Pinterest, Instagram, vintage books, movies, cosplay galleries, thrift-store window displays, and even nature (look at autumn colors!). Screenshot or pin anything that sparks a strong “yes.”
How to build a simple inspiration board
Use a paper collage, a folder on your phone, or a Pinterest board. Include: final silhouette ideas, 2–3 color swatches, accessory inspiration, and a close-up makeup reference. This keeps your work focused.
Materials & Tools Checklist
Before starting, lay out what you’ll need. Below is a practical checklist to make your crafting smooth and efficient.
Basic tools every DIYer needs
- Scissors (fabric + paper)
- Hot glue gun + glue sticks
- Needles and thread (matching colors)
- Fabric glue or fray check
- Measuring tape and pins
- Marker or tailor’s chalk
- Safety pins, elastic, and Velcro
- Optional: basic sewing machine or rotary cutter
Fabric, trims, and thrift-store treasure hunting
- Thrift stores: jackets, shirts, belts, scarves.
- Craft stores: trims, foam, paints, LEDs.
- Home: old curtains, pillowcases, jewelry.
- Online marketplaces: fabric remnants, secondhand cosplay parts.
Costume Design Basics
Think silhouette, palette, and function. How will the costume look in motion? Can you sit, walk, and use stairs? Make sure the main elements enhance rather than hinder.
Silhouette and color palette
Long cloak vs. structured jacket vs. layered streetwear — each tells a different story. Choose 2–3 dominant colors and 1–2 accent colors to keep the look cohesive.
Comfort and mobility
Comfort first! Test movement early. If a piece restricts breathing, visibility, or movement, redesign it. Replace heavy closures with elastic or Velcro if needed.
Step-by-Step Costume Build (Example 1: Classic Witch)
This build is approachable and adaptable for all ages — timeless and dramatic.
Pattern or no pattern
No pattern version: Use a fitted black dress or long shirt as the base. For the cape, cut a semicircle from lightweight black fabric (shoulder to floor length). Attach a collar or tie with ribbon.
Sewing & no-sew alternatives
No-sew tips: Hot glue hem edges, or use fabric adhesive. Add a belt, dramatic collar, and an old hat embellished with ribbon or faux flowers. Finish with fishnet stockings and ankle boots.
Step-by-Step Costume Build (Example 2: Cyberpunk Hero)
Perfect for bold textures and futuristic vibes using layering, paint, and LEDs.
Using foam, LEDs, and paint
- Base outfit: dark cargo pants + fitted top.
- Armor accents: cut craft foam, shape slightly, paint with metallic spray or acrylics.
- Light accents: attach LED strips or EL wire with hidden battery packs.
- Weathering: dry-brush silver paint and sand edges for a lived-in look.
Layering and texture
Combine leather-look fabric, mesh, and matte cotton to balance shine. Use straps, buckles, and painted hardware for an industrial vibe. Layering adds depth in photos and in person.
Accessories That Make the Look
Accessories elevate a costume from “cute” to “memorable.” Small details show up in photos and bring your character to life.
Hats, masks, props
- Staff or wand: a dowel rod painted and wrapped with ribbon.
- Mask: cardstock or craft foam with elastic.
- Hats: revamp a thrifted hat with trims and paint.
DIY makeup and temporary tattoos
Test makeup ahead of time. Use cream makeup for base changes, set with powder, and add eyeliner details. Try water-slide tattoo paper or eyeliner stencils for temporary tattoos.
Hair and Makeup Tips
Hair + makeup = instant transformation. You don’t need pro skills — just creativity.
Quick spooky makeup for beginners
Start with a clean base, add contour for shape, smoke out the eyes, and finish with a bold lip or face paint details. Practice once before Halloween night!
Hair styling tricks on a budget
Use braids, temporary spray color, or headpieces for transformation. Dry shampoo adds texture, while wigs provide instant drama — secure with wig tape.
Troubleshooting Common Problems
Fit issues
If something’s too tight, add side panels or elastic inserts. Too loose? Use ties or snaps. Always pack safety pins and tape for emergencies.
Durability fixes
Glue splitting? Re-glue with fabric glue and clamp. Seams failing? Stitch with thread or secure with snaps.
Safety & Comfort — Important Reminders
Visibility and movement
Ensure you can see and move easily. Avoid masks that block vision. Add reflective tape if walking near roads.
Fire safety & materials
Use flame-retardant fabrics or spray. Avoid trailing fabrics if around candles or crowded spaces.
Photography & Presentation
Best lighting for costume photos
Golden hour light works best. For eerie shots, try backlighting or low angles. Indoors, use soft ring lights for glow.
Posing and storytelling
Sell the character with poses. A witch’s stoop, a cyberpunk stare, or a playful smirk — small gestures bring costumes to life.
Storage and Post-Halloween Care
Cleaning costuming materials
Spot-clean first. Wipe foam gently and hand-wash fabrics. Let dry completely before storage.
Storing for future use
Store in garment bags or labeled bins with tissue paper. This keeps everything neat for next Halloween.
Wrap-up: Final Checklist Before You Go Out
- Test movement and vision.
- Secure fastenings and glue.
- Pack a repair kit.
- Do a makeup rehearsal.
- Keep your phone and emergency info handy.
Conclusion
DIY Halloween is a chance to make something uniquely you. The best costumes tell a story, fit comfortably, and showcase creativity. Use these steps to design a look you’ll love — and remember, the crafting process is part of the fun. Happy Halloween! 🎃👻
FAQs
1. Can I make an impressive costume with no sewing skills?
Absolutely. Use no-sew techniques like hot glue, layered thrift pieces, and creative accessories.
2. How much should I budget for a DIY Halloween costume?
Basic costumes can be made for $20–$50; more detailed ones may reach $75–$200.
3. What are safe LED options for costumes?
Use EL wire, battery-powered LED strips, or clip-on lights. Test them before the event.
4. How can I make my costume look high-quality in photos?
Focus on clean lines, contrast, and textured layers. Great lighting makes all the difference.
5. How do I keep makeup from smudging all night?
Prime your face, apply thin layers, set with powder, and finish with a setting spray.